
Your April Gardening Checklist: Let's Get This Party Started!
OMGosh it's April! It's here! The ground is warming up. It still looks brown out there but there is a change blowing in the cool winds of spring.
This is an exciting, motivating month for us gardeners! The days are gaining length and frost-free growing days are getting closer!
It's time to set in motion our priorities in terms of our indoor sowing and start thinking about direct seeding early cool-loving crops in the ground like peas, radish, turnips, spinach, arugula and cilantro, a personal favorite of mine!
First some quick tips and notes!
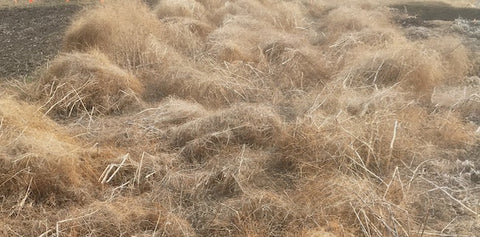
* Protect your soil: Enter your garden with care in the spring. This is a delicate time! Everything is waking up. Tread lightly-- especially on wet soils to avoid compaction. Use planks or plywood to distribute your weight-- so you don't sink in. Or use removable pavers for those 'oft trod' areas.
* Begin some light tidying around the garden but with an eye towards minimizing your disturbance to only what's necessary. This will give those crucial pollinators and beneficial insects time to emerge from their winter hiding places.
The Xerces Society suggests that we in northern regions delay clearing garden debris and cutting back perennials until mid-to-late April, as much as is possible. A good benchmark is to watch for when the apple trees are done blooming-- then most of the pollinators will have emerged and it’ll be safer to clear the rest of the debris. So let that asparagus patch be just a little longer before you mow it down-- if you can!
* Watch those ground temperatures and plant when the soils warm enough to support germination! If you plant in too cold soils, you run the risk of the seeds rotting before they can germinate.
* If direct sowing brassicas and other cold tolerant crops outdoors, consider using a cold frame or row cover to protect them from sudden dips in temperature and insect pests, like those black flea beetles that plague arugula!
* Peas are one of the first crops a lot of people direct seed. Some recommend soaking your pea and bean seeds prior to planting to speed germination. We do NOT recommend soaking for a couple of reasons-- first, you risk washing away the protective layer of beneficial microbes on the surface of the seeds. Secondly, you truncate the inherent 'wisdom' of the seed, imbibing water, sensing the soil temperatures, and 'knowing' the time to rise.
If you employ a soaking method for your peas and beans, do NOT soak for more than 1 hour. Afterwards, let the surface dry just a bit and inoculate to replace the microbes you just washed off. Here's our recommended inoculant-- OMRI listed for organic production. Follow the label instructions.
Here's your April gardening checklist!
Helping you stay on top of this month's important to-dos.
Top of the list is indoor seed starting!
✓ Let's start with quickest to harvest-- those salad LEAVES! Maybe you've already started some of those cold-tolerant greens indoors-- lettuce, spinach, kale, arugula, parsley, cilantro, tatsoi, pac choi. Salad anyone?
✓ Consider starting some outdoors too using a cold-frame or low-tunnel with row cover for added protection. Spinach and arugula are particularly cold tolerant and need very little protection; both love the cold.
 Nobel spinach seedling
✓ Next up for us-- like right now-- is starting onions, peppers, eggplant, herbs, brassicas crops, like broccoli, cabbage and kale, and of course lotsa flowers! These all need the longest runway and so are a priority for sowing.
✓ Peppers and Eggplants: Both plants can be started from now through mid-April. Starting peppers now will mean more ripe peppers to green ones in our short growing season! Peppers and eggplant need plenty of time and warmth to germinate. Start them indoors in your warmest spot and practice patience. We like to put a full tray of sown peppers in a clear plastic bread bag. This will keep the environment moist until germination takes place. Watch them carefully! Once a few seedlings emerge, get 'em out of the bag and under those grow quickly to prevent them from getting leggy damping off!
✓ Tomatoes: We hold off on the tomatoes for another week-- we start sowing tomatoes on or about April 10th. Starting them too early means more coddling and your run the risk of them getting root bound and leggy before you can transplant them outdoors. Make sure your tomatoes get sufficient light!
✓ And don't sow those ground cherries just yet-- they grow super fast, so much faster than tomatoes, even though they're in the same family! Start those in a couple more weeks.
✓ Roots: Radishes are quick and easy crops that thrive in cool weather. Practice succession planting with radishes, sowing a little more every two weeks to space out your harvest! And as something new, I suggest you try braising or sautéing those delicious greens.
✓ More roots: Carrots and beets can be direct-sown in our area mid-to-late April. Again, check those soil temps for optimal germination.
✓ Flowers: Plenty of flowers can be sown this month. Indoor starts: Bachelor Buttons, Camelia Flowered Balsam, Lemon Bergamot, Cosmos, Four O'clocks, Hollyhock, Burning Love, French Mallow, Marigold, Mexican Sunflowers, Petunias, Rubeckia, Sage, and Zinnias.
✓ If you prefer to skip the grow lights then direct sow these cold-tolerant flower seeds during the later half of April: Cleome (AKA Spider Flower), Morning Glory, Wild Chamomile, Calendula, Marigold, Poppy, Phacelia, Borage and our gorgeous Dwarf Grey snow peas-- for strikingly beautiful flowers and edible pods!
These are just a few of our favorite vegetables and flowers to sow in April! For a full schedule of vegetable sowings through May, consult our Start, Plant, and Transplanting guide. You can access those here! (After clicking the link, scroll down 'til you see a picture of me-- look 2 paragraphs up from there to find the links to download our guides. Click on the picture of me to watch our YouTube video to see how to customize and use the charts!)
Can't say it enough-- pay attention to those soil temps for optimal germination! (Use a meat thermometer to measure those temps! Read all about it here!)
Outdoor Spring Cleaning:
✓ Don't get in a rush! There are good reasons to keep your beds covered with mulch, leaves, or even cardboard. The pollinators that overwinter in the refuse, the earthworms and all those beneficial microbes that are just waking up from their winter resting places will thank you!
✓ As your top soil becomes more workable, it's a good time to add a layer of compost to your beds. But again, after adding the compost, be sure to cover those beds with mulch as you go to protect those living microbes, encourage earth worms, and conserve those nutrients from weathering.
✓ Kitchen scraps built up over the winter? If your compost pile is thawing out, it's ready for some TLC. Time to mix in carbon-rich materials like leaves, brown grass clippings (make sure there's no grass seeds) or cardboard to help restore the balance. A ratio of 3 parts carbon-rich 'browns' to 1 part nitrogen-rich 'greens' (e.g., kitchen scraps-- and grass clippings when they become available). Mix in the browns and give everything a good turn. The browns will also help soak up some of the excess moisture as the kitchen scraps thaw and start breaking down-- keeping those nutrients in place.
✓ Keep an eye on the moisture levels of your compost as the season progresses. Compost should stay about as moist as a wrung-out sponge. This may mean adding water during dry weather or covering your pile with a tarp if you're expect long stretches of rainy weather. We don't want those nutrients to wash away!
✓ For the wildlife, make sure your birdhouses are cleaned out and ready for new spring inhabitants, if you haven't done that already!
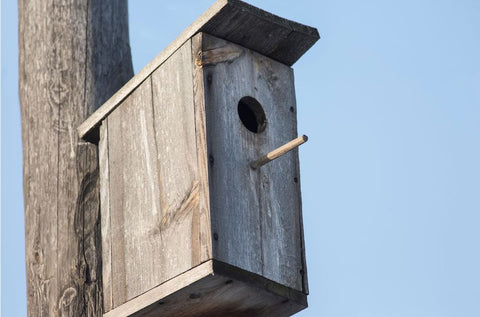
Spring cleaning birdhouses in April
✓ Another cleaning task is to empty and prep your planting pots and containers. Many gardeners disinfect their containers in a 1:9 solution of one part bleach to nine parts water for ten minutes. We've never done this and don't recommend-- unless you've had disease issues the previous year. Using bleach will kill off the good with the bad and upset the microbial balance. Instead we use just plain water, adding a mild dish soap if needed, using a bristle brush to scrub soil debris and any mineral deposits. Then we rinse, and allow to dry.
✓ Highlight the things on this checklist that are most relevant to your garden efforts. Write them into your FREE garden planner. Download it here!
Remember, don't let this checklist overwhelm you. You don't have to do it all at once! Gardening is totally scalable-- do a little or a lot, as your time allows. Having a list means that when you find some time-- you can scan the list for priorities or tasks that are doable in the window of time you have available! No more indecision about what to do! ✓ 📣 CHECK‼️
Happy seed starting and sowing!
Your garden coach,
Theresa